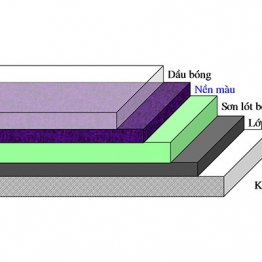
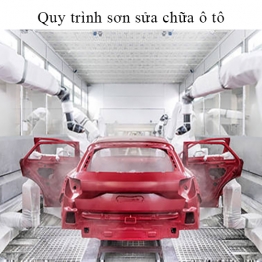
Matting process in automotive repair paint
In automotive repair paints, the matit consists of four basic steps
1. Determine the amount of matte needed
Determining the correct amount of matte required requires an experienced painter and accurate calculations. Excessive mastication will result in material loss and hardening of the mastic when mixed with the hardening agent, while too little extraction will result in longer mixing and matting.
2. Mix the matit
Take the matit: Normally, the components of matte are solvents, resins and detachable solvents in the box. Because the matit can not be used in the separation state, it must be thoroughly mixed before being removed from the box, applying the same to the curing agent. Squeeze the tube so that the ingredients are mixed before use.
Put the required amount of matte on the mixing plate. Then add sufficient amount of curing agent based on the standard mixing ratio. Do not take too much matit once, even if you need to mite large areas. At first, just get enough egg mat, then add if needed.
Mix Matit: Use a mixing knife, when carefully mixed in the brush, so that there is no gas into the mat.
Note:
-
Cover the box immediately after use to prevent the solvent from evaporating.
-
Do not remove the matit stick to the mouth of the tank.
-
Do not squeeze the curing agent directly onto the base.
-
The hardening process immediately after the curing agent enters the maitake.
3. Technique of matit
How to hold a matte knife: There is no special way to hold a knife, each person will have a way to use it to fit and convenient with yourself.
Mati mat: Do not put more matte at once. Depending on the position and shape of the bait area, it is best to mix the mats several times.
-
For the first time, keep the knife nearly square and squeeze the matte into the work surface to loosen the thin matte and ensure that the matte fills the hole and even the smallest scratch to increase adhesion.
-
Second and third, tilt the knife at an angle of about 35 to 45 degrees and add more matit than needed. Gradually expand the matit area after each bait. Should be around the edges a thinner layer, to slightly scrape the knife to not create thick layer at the edge.
-
At the last bait, keep the knife near the work surface and smooth the surface.
Plate the matit on the plane: Put a thin layer of matit on the entire area needed.
To minimize grinding during the next stage of grinding, let the second layer of mats not create a thick edge. If the knife is in position as shown on the left, apply the force to the top of the knife with your index finger to create a thin matte at the top.
Place the matit in the next section: cover the first part a little in step 2. To lay a thin layer at the beginning of the pass, bundle the knife and knife close to the work surface. After that, do not force and slide at the same time. Next, bend lightly on the knife to create a thin layer at the end of the bait.
Repeat step 3: above until the entire coverage area is covered.
Attention
-
When scooping up the mat, there should be only a mat in the middle of the knife blade.
-
Do not cut the knife in one direction.
-
The best matite should be slightly above the original surface.
-
Do not create a wavy surface when mating the matit.
-
Matit on the surface with scratches.
-
Matit must be finished within 3 minutes after mixing.
-
Once the bait is finished clean the surface of the knife.
-
Fire safety.
4. Dry the matte
The wetted matit will heat up through the reactive heat in it. So, promote the drying reaction.
In general, it is possible to mite the matite after 30 to 60 minutes depending on the manufacturer. The reaction inside the matte will slow down at low temperatures or high humidity, requiring longer periods of time to dry the matte. In order to accelerate the drying of the mats, additional heat is required, so a dryer or infrared light must be used.
Attention:
If using a light or dryer to heat and dry the matte, pay attention to keep the matit surface temperature below 50oC to prevent the matit from peeling off or cracking. If the surface is too hot to touch, then the heat is too high.
The temperature in the thin matte area tends to keep the heat relative to that of the thick matte area. This low temperature will inhibit the thinning reaction. Therefore, always check the thin mantle sections to determine the drying conditions of the mats.
Relative News