Automotive Refinish - Coating process
The main steps in the paint repair process of cars
1. Receiving Vehicle
When receiving the car, painters should carefully check the surface, mark the area to be treated with a brush, exchange full requirements of customers to solve the best.
Many painters or painters ignore this part. Brothers pick up the car and confidently make the car as new. However, many guests have other requests. Therefore, it is best that you record all your requests to resolve them.
2. Abrasive surface preparation
Surface preparation is extremely important in the automotive paint process. If the surface is not cleaned and polished, the paint will not be beautiful and perfect. Surface preparation consists of the following steps:
-
Abrasive paint: use P80 rough surface paint scratches the area, the impact of the hammer.
-
Bleaching and lowering: Using P120 - P180 sanded edge of the eyelid at least 10mm, creating adhesion for the next step. Note, the surface must be scraped sufficiently to prepare the matte residue.
-
Cleaning surfaces: Using air gun to clean the surface, then use gasoline to clean the surface thoroughly. Thus, surface preparation is finished, we turn to anti-rust layer.
3. Anti-rust paint
The chassis is mostly metal, so it requires a rust-proof coating to protect the metal surface from corrosion. Anti-rust coating process:
-
Lacquer paint: paint tools include paint cups, paint stick, electronic scales. When blending, you need to mix the correct ratio provided by the supplier.
-
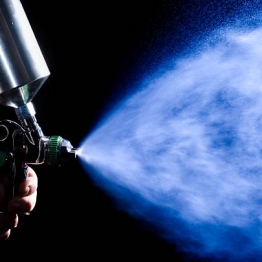
Spray anti-rust paint: Use a 1.5 mm gun to spray one layer onto the surface. Make sure you do not spray on old paint and cover with steel.
-
Anti-rust paint drying: about 60 degrees Celsius for 5 minutes or 20-30 minutes for natural drying.
-
Cleaning surface details: Spray petrol, use a clean towel to re-surface to prepare the mat.
4. Make Matit
Finish the matit prior to official painting. The mattit consists of the following steps:
-
MIXING: Before using, we need to mix matit with hardener. You need to mix precisely the proportions specified by the supplier.
-
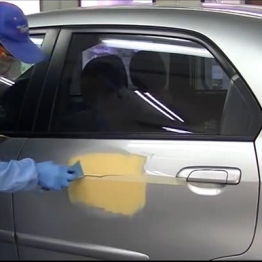
Matit: mite usually 3 to 4 layers. The top layer should be a thin layer, pressed firmly to clamp the hands. Then add more filling to the damaged area. Note: do not sand the area.
-
Check mat fill: use a ruler or hand to check the fill level of the matit. You need to check the place in full light, can use the lights or sunlight.
-
Matit drying: use an infrared light drying for 15-20 minutes at a temperature of 60 degrees C.
-
Check the surface: using the fingernails scratches the surface to see the white is okay.
-
Cover the ink: use foam sponge to apply ink evenly over the surface of the matte.
-
Rub matit (sanding): sanding P80 only on matit surface, the next sanding gradually expanded, rub in different directions. Note: Avoid scratches.
-
Check the surface: mark the areas that are faulty for processing, repainting the rust if the steel open.
-
Rub matit (orbital machine): need to rub in different directions, machine surface is always perpendicular to the details.
-
Cleaning detailed surface: using a gas gun to clean the surface details, spray gasoline, using clean cloth to wipe even surface details.
5. Surface Paint
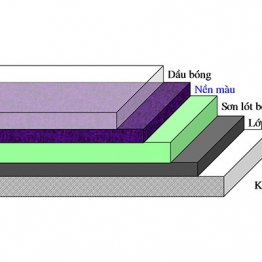
Surface coating is a coating that helps prevent the absorption of matte, increase the intensity of color, make the paint more beautiful and perfect.
-
Shielding details: overturned eyelid when shielding, avoid creating edges, shielding distance from the area of 20-25 cm. Note: cover the entire area do not repair, do not use newspapers to shield.
-
Primer: phase in the ratio of the product.
-
Spray primer: Use gun 1.5, gas pressure 1.3 - 1.5 bar, spray 2 to 3 times in ascending order. Each coat is 3 to 5 minutes apart.
-
Drying primers: dry for 15 minutes at about 60 ° C.
-
Examination and treatment of holes: Using the eye to observe the surface of the primer, combined with the light to find the surface fault. Use a knife to tighten areas of holes.
-
Cover the ink: Use foam sponge to apply ink evenly over the surface of the matit. Use ink to check the surface regularly.
-
Scrubber (sanding): Sanding P240 only on the matte surface, the next level of sanding gradually expanded, rub in different directions.
-
Scrub primer (orbital machine): To rub in different directions, the machine surface is always perpendicular to the details. If mastic, mat should be repaired.
-
Cleaning and inspecting details: Using air gun to blow clean details; Spray gasoline wipe, clean with a clean cloth on the surface of details.
6. Spray Color
-
Shielding details: similar to the front cover, it should be turned upside down for the paint area, covering the entire area not repaired.
-
Color mixing: This is the most important work in the automotive paint process. You need to determine the color code, then find the formula and the correct phase ratio needed. You need to check and try thoroughly before the official spray on the car.
-
Use dusty cloths: Wipe all surfaces that have been sanded or sprayed.
-
Adjustable color paint gun: Paint color gas pressure (1.8 -2.0 bar), paint (2 -2.5 round), spread (2 -2.5 round). Note: Check gun before pouring paint and gun when adjusting.
-
Paint color details: paint overlay 50%, spray 3 -5 minutes, distance 20cm, always keep the gun perpendicular to the surface.
7. Shadow Paint
-
Paint details: similar color paint.
-
Drying: set the drying temperature to about 60 degrees, drying from 25-30 minutes. It is necessary to check the temperature of the drying frequently to avoid blistering, pinching.
-
Polishing: Apply grinding dust patch (if any). Measure the thin xi on the surface (30-30cm), lightly run the machine on the surface before passing.
8. Final Examination
-
Final inspection in full light conditions, recording of abnormalities. The car painting process consists of eight major steps, but includes many small steps with different skills. You try to do good step by step to ensure the car after painting beautiful and durable.
If you have any questions about automotive paint please send to Son Nguyen. We will answer all your questions.
Relative News
